


I gave a quick demonstration of Node-RED to a client recently and I didn’t get the response I was expecting.
On bringing up the Node-RED browser interface, the first question I got asked was why doesn’t Node-RED use a TLS (Transport Layer Security), or SSL (Secure Socket Layer), connection to the server.
Great question, I’m sure we are all security minded these days, if not, we should be.
So, in this article, I show how we can add a couple of security features to make this application more secure.
TLS/SSL Connection
To make our browser connection secured, we have to have generate a pair of private and public security certificates.
We will use the open-source application of OpenSSL to produce these certificates.
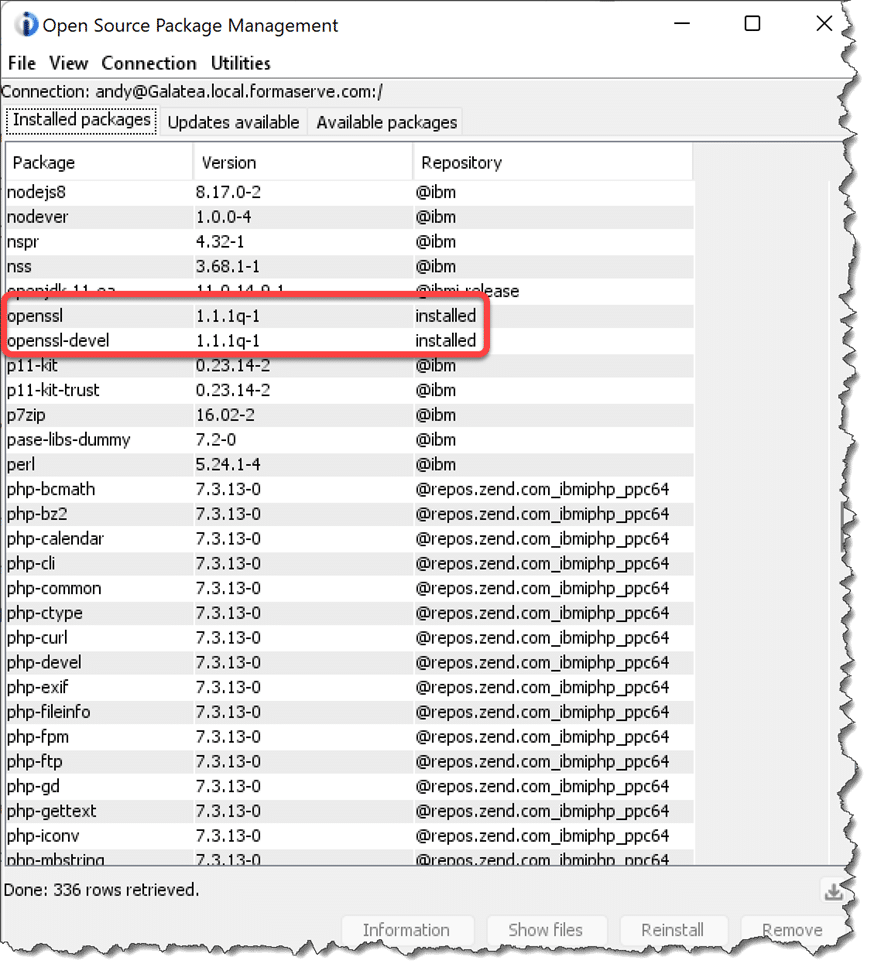
To install OpenSSL on your IBM i, use either Access for Client Solutions (ACS), or Yum.
As can be seen in the figure below, I have the required packages already installed.
There are three steps we need to run to generate our certificates.
From a BASH shell session, run the following commands and input your answers as necessary.
openssl genrsa -out private.pem 1024openssl req -new -key private.pem -out certrequest.csropenssl x509 -req -in certrequest.csr -signkey key.pem -out cert.pem
I ran these commands in my /HOME/ANDY directory on the IFS, but they can be in any location you desire.
Next we have to make changes to our Node-RED settings file, called settings.js. This is normally located in the users home/.node-red directory (notice the dot prefix on that directory, it is a hidden directory).
The settings.js file is a node.js module, not that we need to know that.
It would be my recommendation that you take a copy of the settings file prior to any changes.
Use the CP command to achieve this.
cp settings.js settings.bak
then open the settings.js file in your favourite editor. No choice for me, always Microsoft’s Visual Studio Code, but any editor will suffice.
The Node-RED settings.js file has all the settings we require to make it HTTPS, albeit, they are commented out (have two // at the beginning of a line).
As can be seen in the figure below, uncomment lines 93 to 96 and place the names of your certificates in lines 94 and 95.

To those developers who have some knowledge of the Node.js Express application, this will seem very similar.
Now when starting the Node-RED server, we can see it now asks us to point our browser to an https connection.
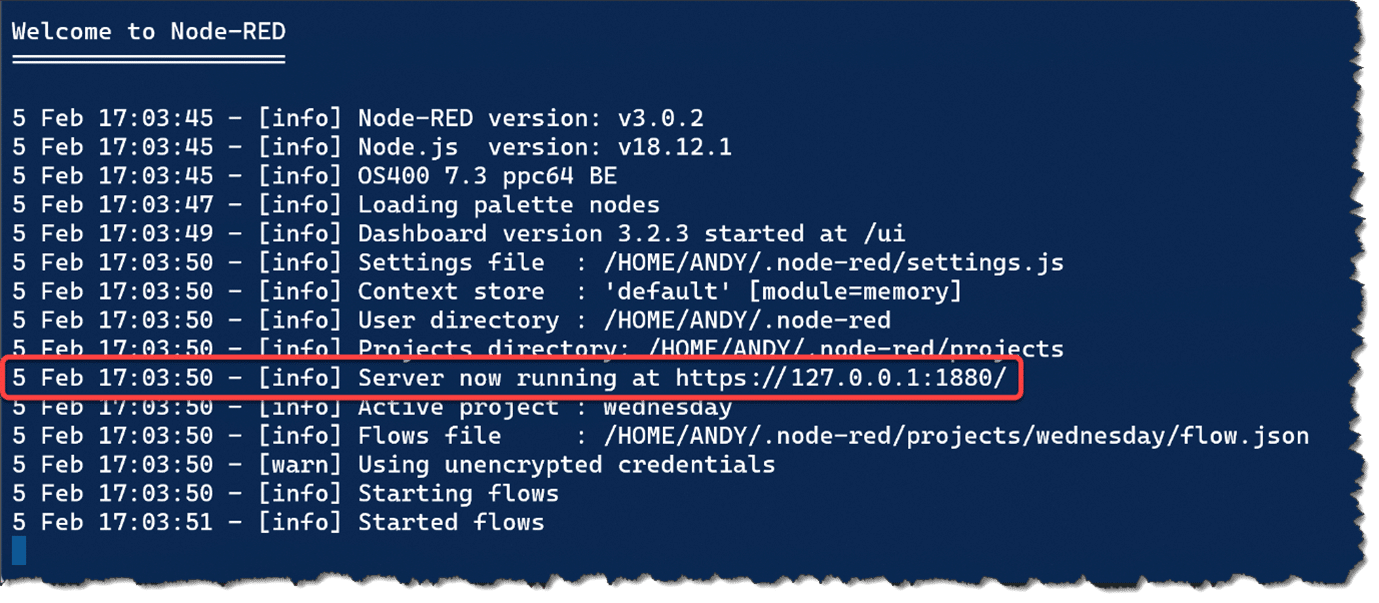
All very straightforward.
On pointing your browser to the secured location, it may ask you to ignore any self signed certificates.
Restricting User Access
Another security feature we can employ is to only allow certain users to access Node-RED from the browser. Let us take a look at this.
The first thing to say about allowing user authentication is that we cannot achieve this task using our traditional user profiles for this functionality.
Maybe, this will change in future enhancements. If not, maybe I’ll write an interface to allow IBM i profiles to be used within Node-RED.
To enforce user authentication, we have to uncomment another section of our settings.js file, this time the adminAuth section.
As we can see from line 76 below, the users section is an array of users, within each element, the username, password and permissions properties.
We can insert our own users into this section, if we desire.

The permission property, can be either * for all permissions, and read for restricted read only access (read permissions ensures users cannot edit or create new flows).
The admin user has been created with a password of password. Testing only of course!
Now when we try to access our flows we get user name and password prompts.

Each users password is encrypted using the bcrypt hashed algorithm.
To encrypt a password, to save in the settings.js file, Node-RED provides a command to easily generate passwords using bcrypt.
We use the following command from a shell session.
node-red admin hash-pw
On running this command, it will prompt you to input a password, then the encrypted password will be output on the screen. Copy this value into your settings.js for that user. All very easy.
New Version
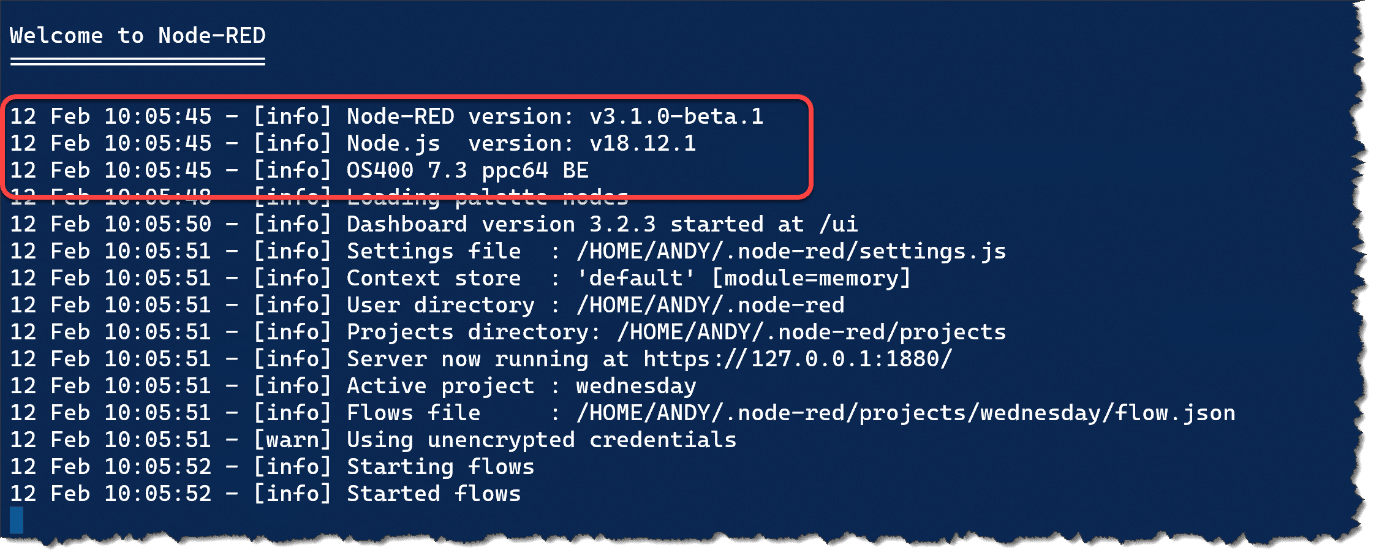
Please note that at the time of writing this article Node-RED version 3.1.0-beta 1 has just been released.
We have this running on our Power server without any issues to date.
If you are interested in trying this new version, along with your current version, please check-out our instructions which can be found on our GitHub repository https://github.com/FormaServe/f_Learning/blob/master/NodeRED/nodeRed%2031beta.md
Conclusion
In conclusion, using TLS/SSL to secure the traffic on your Node-RED application is a crucial step in ensuring the privacy and security of sensitive information transmitted over your network.
Then, by adding user security, you can further enhance your security procedures.
Please be aware that Node-RED can also use OAuth2 tokens, to enable enhanced security. I will cover this in a future article.
All the examples I have written for this article, and previous ones, can be found on my open-source repository on GitHub, which can be found at https://github.com/formaserve/f_Learning
If you have any questions, either on this article, or anything else on the IBM i, use the comments below, or send me a message on twitter @AndyYouens
Andy Youens is an IBM i consultant/instructor at Milton Keynes, UK-based FormaServe Systems with over 40 years IBM midrange experience.

IBM Champion
Leave a Reply